¶ 添加一个扩展
接下来我们会以创建一个兼容 Arduino UNO 的 LED 模块资源为例,演示如何编写添加扩展资源。
- 创建扩展文件夹
首先在 ./extensions 文件夹下创建一个新的文件夹以扩展名称命名并遵循驼峰规则:commonLed
mkdir ./extensions/commonLed
cd ./extensions/commonLed
- 创建
index.js文件
index.js 是用来描述扩展各个属性的文件,创建这个文件,并写入以下内容。
const commonLed = formatMessage => ({
    name: formatMessage({
        id: 'commonLed.name',
        default: 'Common LED',
        description: 'name of common led extension'
    }),
    extensionId: 'commonLed',
    version: '0.0.1',
    supportDevice: ['arduinoUno', 'arduinoNano', 'arduinoLeonardo', 'arduinoMega2560'],
    author: 'Your Name',
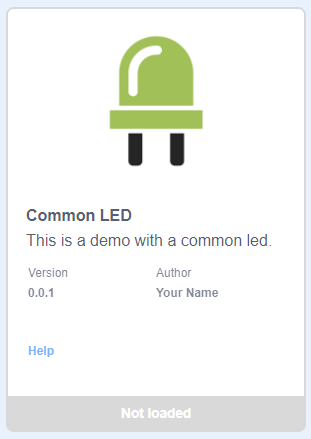
    iconURL: `assets/commonLed.png`,
    description: formatMessage({
        id: 'commonLed.description',
        default: 'This is a demo with a common led.',
        description: 'Description of common led'
    }),
    featured: true,
    blocks: 'blocks.js',
    generator: 'generator.js',
    toolbox: 'toolbox.js',
    translations: 'translations.js',
    tags: ['actuator'],
    helpLink: 'https://wiki.openblock.cc'
});

module.exports = commonLed;
然后按照 iconURL 属性的设定,创建 assets 文件夹,下载下方的图片并放入。

- 创建
blocks.js文件
这个文件描述了积木的样式结构,创建它并写入以下内容。
function registerBlocks (Blockly) {
    const color = '#A1C057';
    const secondaryColour = '#82A14C';

    Blockly.Blocks.commonLed_setLEDState = {
        init: function () {
            this.jsonInit({
                message0: Blockly.Msg.COMMONLED_SETLEDSTATE,
                args0: [
                    {
                        type: 'input_value',
                        name: 'pin'
                    },
                    {
                        type: 'field_dropdown',
                        name: 'state',
                        options: [
                            [Blockly.Msg.COMMONLED_ON, '1'],
                            [Blockly.Msg.COMMONLED_OFF, '0']]
                    }
                ],
                colour: color,
                secondaryColour: secondaryColour,
                extensions: ['shape_statement']
            });
        }
    };

    return Blockly;
}

exports = registerBlocks;
其中 Blockly.Msg.XXX 的内容是多语言支持文本,他们的实际内容定义在 translations.js 文件中。
- 创建
toolbox.js文件
这个文件定义了积木在左侧工具栏中的样式,创建它并写入以下内容。
function registerToolboxs () {
    return `
<category name="%{BKY_COMMONLED_CATEGORY}" id="COMMONLED_CATEGORY" colour="#A6D200" secondaryColour="#A1C057">
    <block type="commonLed_setLEDState" id="commonLed_setLEDState">
        <value name="pin">
            <shadow type="math_number">
                <field name="NUM">2</field>
            </shadow>
        </value>
    </block>
</category>`;
}

exports = registerToolboxs;
其中 BKY_COMMONLED_CATEGORY 工具栏目录的名称,它是一个多语言支持的文本,实际内容定义在 translations.js 文件中。
- 创建
translations.js文件
此文件为多语言支持的翻译文件,创建它并写入以下内容。
function getInterfaceTranslations () {
    return {
        "en": {
            "commonLed.name": "Common LED",
            "commonLed.description": "This is a demo with a common led."
        },
        "ru": {
            "commonLed.name": "Общий светодиод",
            "commonLed.description": "Это демо с общим светодиодом."
        },
        "zh-cn": {
            "commonLed.name": "普通 LED",
            "commonLed.description": "这是一个通用 LED 的演示。"
        },
        "zh-tw": {
            "commonLed.name": "普通 LED",
            "commonLed.description": "這是一個一般 LED 的演示。"
        }
    }
    ;
}

function registerBlocksMessages (Blockly) {
    Object.assign(Blockly.ScratchMsgs.locales["en"],
        {
            "COMMONLED_CATEGORY": "COMMONLED LED",
            "COMMONLED_OFF": "off",
            "COMMONLED_ON": "on",
            "COMMONLED_SETLEDSTATE": "set pin %1 LED %2"
        }
    );

    Object.assign(Blockly.ScratchMsgs.locales["ru"],
        {
            "COMMONLED_CATEGORY": "COMMONLED LED",
            "COMMONLED_OFF": "off",
            "COMMONLED_ON": "on",
            "COMMONLED_SETLEDSTATE": "set pin %1 LED %2"
        }
    );

    Object.assign(Blockly.ScratchMsgs.locales["zh-cn"],
        {
            "COMMONLED_CATEGORY": "COMMONLED LED",
            "COMMONLED_OFF": "off",
            "COMMONLED_ON": "on",
            "COMMONLED_SETLEDSTATE": "set pin %1 LED %2"
        }
    );

    Object.assign(Blockly.ScratchMsgs.locales["zh-tw"],
        {
            "COMMONLED_CATEGORY": "COMMONLED LED",
            "COMMONLED_OFF": "off",
            "COMMONLED_ON": "on",
            "COMMONLED_SETLEDSTATE": "set pin %1 LED %2"
        }
    );

    return Blockly;
}

if (typeof module !== 'undefined') {
    module.exports = {getInterfaceTranslations};
}
exports = registerBlocksMessages;
- 创建
generator.js文件
generator.js 文件定义了此资源的积木的代码生成规则,创建它并写入以下内容。
function registerGenerators (Blockly) {
    Blockly.Arduino.commonLed_setLEDState = function (block) {
        const pin = Blockly.Arduino.valueToCode(block, 'pin', Blockly.Arduino.ORDER_ATOMIC);
        const state = this.getFieldValue('state');

        Blockly.Arduino.setups_[`commonLed_init${pin}`] = `pinMode(${pin}, OUTPUT);`;

        return `digitalWrite(${pin}, ${state});\n`;
    };

    return Blockly;
}

exports = registerGenerators;
- 完成
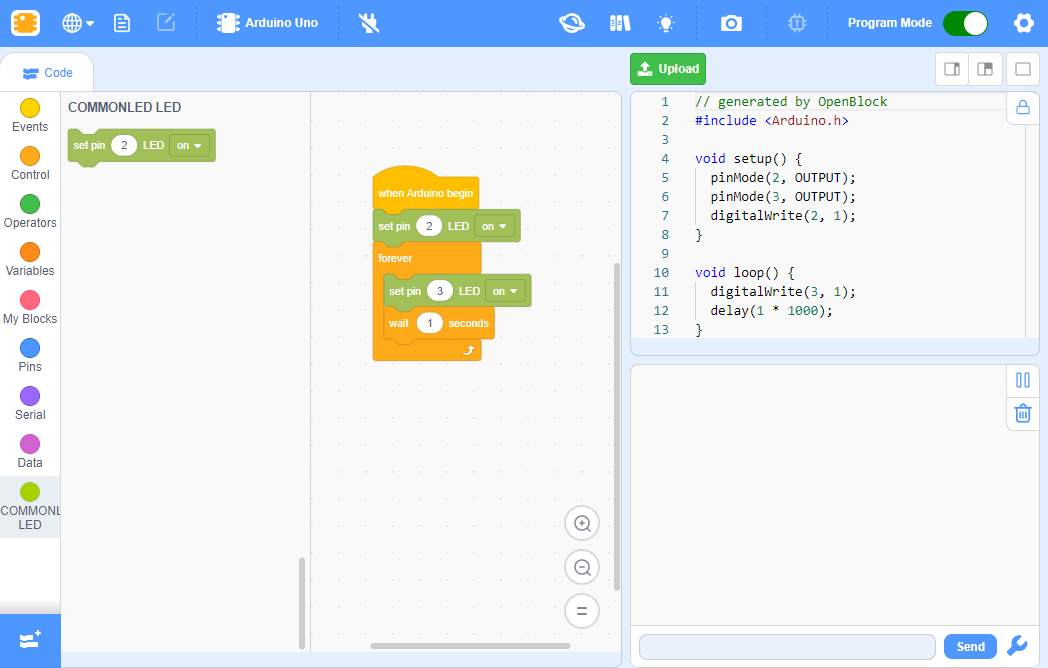
最后我们重启或打开 OpenBlock ,选择 Arduino UNO 并切换到上传模式,然后我们就可以在扩展选择界面中使用我们刚刚创建的新模块了。

